
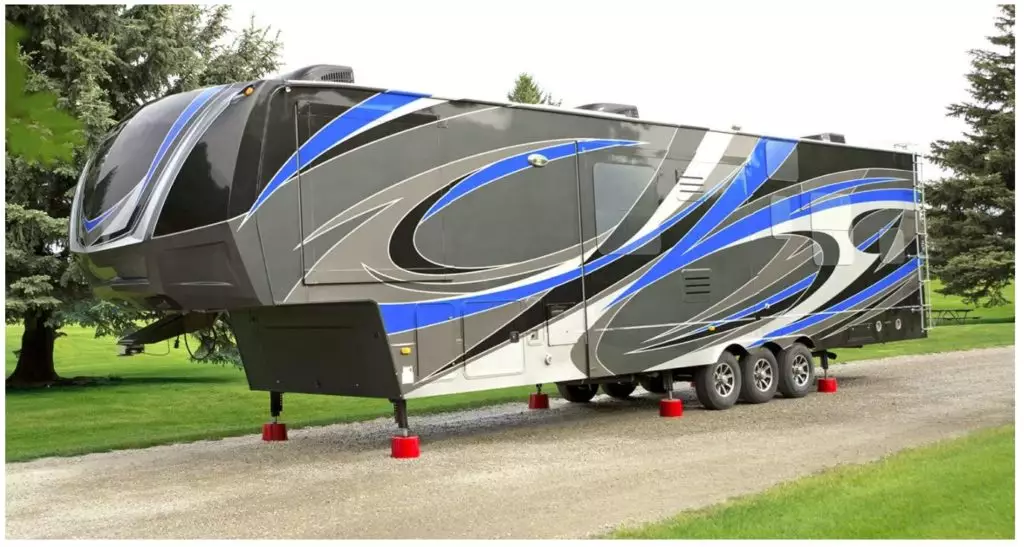
We will have to level the RV with chocks or wedges, or with other more rudimentary or advanced methods, such as hydraulic legs or pneumatic suspension, many times because the parking spot is irregular or sloping. We’ll learn how to level an RV or camper by doing the following: Commercial options and Homemade RV Leveling Blocks. How to make leveling blocks for RV? RV leveling blocks review commercial options. And step-by-step DIY RV leveling blocks (affordable and perfect for your camper and travel trailer). For the DYI, we have the Step by Step with Pictures and Short Video.
What is the significance of leveling the motorhome? It’s not just for sleep, cooking, or showering for safety and comfort. It’s also necessary for various domestic equipment, such as the refrigerator, to work properly.
It’s time to set up camp once you’ve arrived at your chosen location.
That’s when you see the camper isn’t standing upright. You’ll have to level your RV if this happens. But how do you do it?
Some of the more luxurious motorhomes will now have a “Level” button. The motorhome will automatically level itself when you press this button. Some people will be able to lift the RV off its wheels.
Unfortunately, not everyone has access to such convenience. Fortunately, leveling your motorhome is a reasonably simple and quick task.
I’ll provide you with a few leveling tips and tactics in this article to learn everything about Homemade RV Leveling Blocks, truly DIY RV leveling blocks. In this article, you will find How to make leveling blocks for RV? In addition, I have side-to-side DIY RV leveling blocks that cost less than $15. Interested? Let’s get started.
Le’s start with de RV Leveling Blocks – DYI RV leveling blocks – Step by Step with Pictures and Short Video.
Table of Contents
Homemade RV Leveling Blocks – DYI RV leveling blocks – Step by Step with Pictures and Short Video
How to Level Your Own Camper?
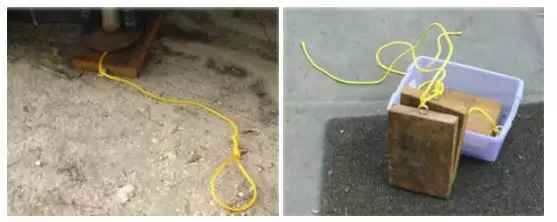
How to Make A Cheap and Effective Leveling Block System For Your Camper Or RV. All it requires is a couple of wood boards that you can go down and get at your local lumber store treated or untreated boards whatever your preference is.
I personally use untreated wood boards because it’s cheaper and I haven’t had any issues yet. I’ve been doing these homemade leveling blocks for RVs for a couple of years now. And like I say it’s a lot cheaper than buying the plastic blocks you can build it up to whatever height you need based on the site that you’re camping at and the equipment you’re using so without further ado let’s get into it I’ll show you how to level your own camper nicely.
Step 1 is going to be to take the measures needed. So, grab a tape measure and measure the wheelbase of the axles that you’re going to be putting blocks underneath. As you can see, in my case I’m using a travel trailer so I just have to measure these two axles right here as shown in the picture below. So, in my case, I’m doing my homemade leveling blocks for a travel trailer.
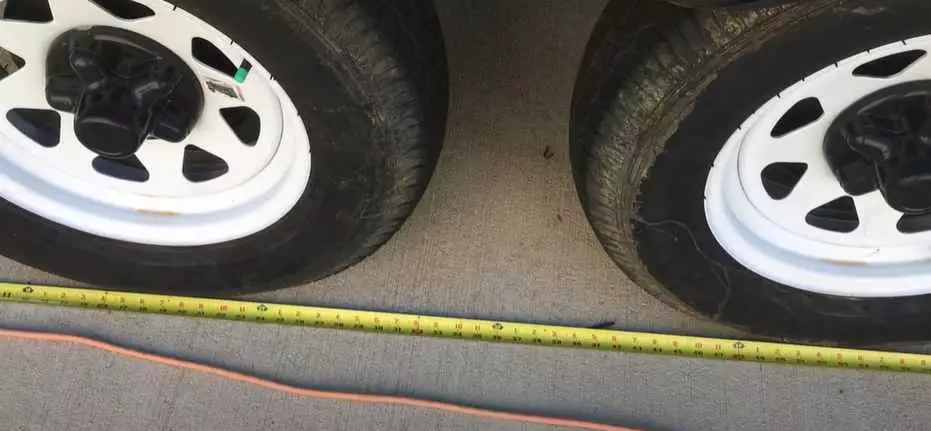
If you’re DYI leveling blocks for an RV you just need to measure the distance that you’re comfortable with to get your camper parked on these blocks and build your steps up to get there.
It’s a lot easier with the travel trailer because you only have to have one system for each side. Typically, you’re only level on one side unless you’re on a site that has an uphill or downhill grade in the direction of your parking.
If you’re doing homemade leveling blocks for an RV this will work you just have to adjust accordingly to having four separate block systems in place instead of one or two.
Step 2 – Then, based on your experience and parking a camper you need to give yourself a little extra obviously you don’t want to have your block system ends shorter or ends to close your axles. You should have a little bit of wiggle room when measuring that way if you don’t get on the brakes quite quick enough, you’re not going to fall off the back end of the block system.
If possible, it’s recommended always have a person guiding you over the ground, somebody who is helping you watch your move, to make sure that you don’t hit something with your camper (with a tree branch or a picnic table behind the campsite) that you can’t see in your mirror whatever the case and to make sure that you don’t back over your boxes.
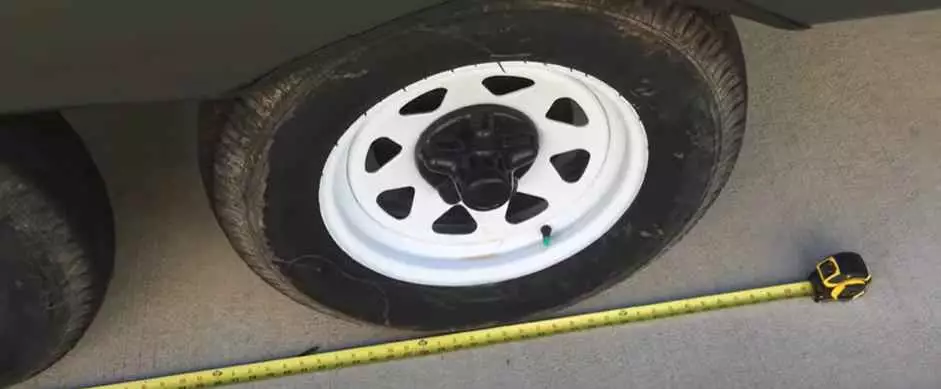
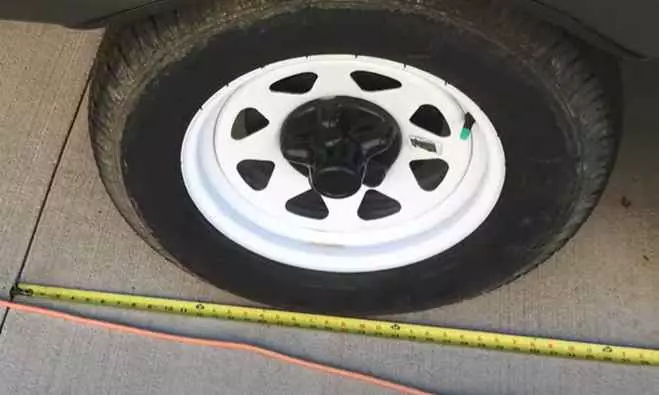
In my case, I found that about sixty-four inches is a comfortable working distance for me as you can see in the picture below, going from this little relief cut in my parking pad to sixty-four inches puts me just a little bit in front of the tire, and some of my blocks because I was using some scrap wood that I had laying around actually is a little bit longer.
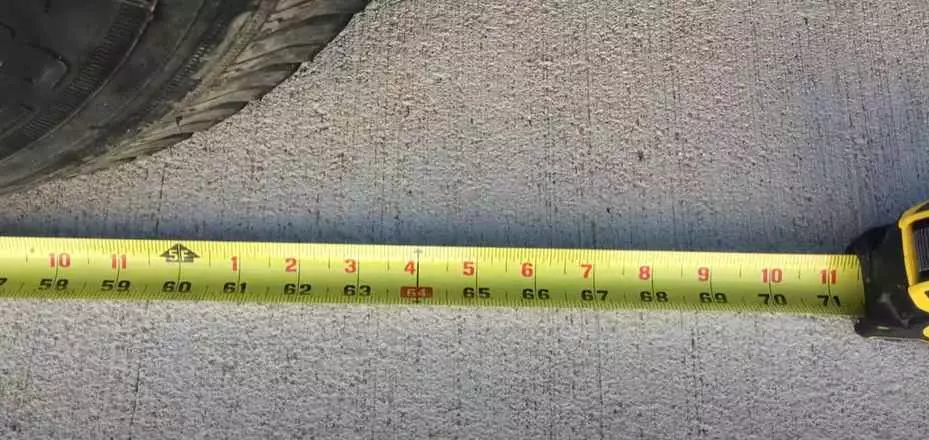
62 to 64 inches is a good range for me that’s based on my experience level, which is relative. You may not have that same experience; you may not be as comfortable with that small of a block you may want to add four inches or six inches or whatever you’re comfortable with. Of course, it goes without saying that when you’re using these wood blocks don’t flex as much as the plastic.
Step 3 – Clear the area before placing your blocks. Make sure you have gravel or anything excessive underneath the block cleared out when you put it down on the ground. Therefore, you don’t end up cracking your boards.
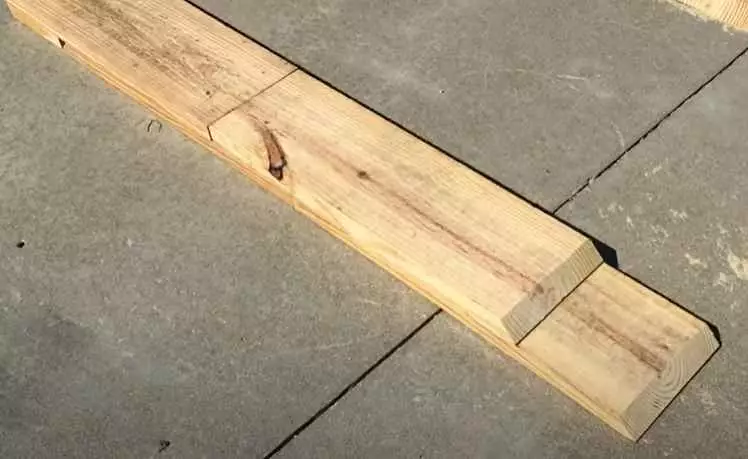
Step 4 – I found that for storage purposes it’s easiest to cut it in half. So, 64 inches, I try to make my blocks around 32 and then I lay them one next to the other.
Let’s say that my driver’s side was a little bit lower I would be using two blocks on the driver’s side, one laid end-to-end next to the other.
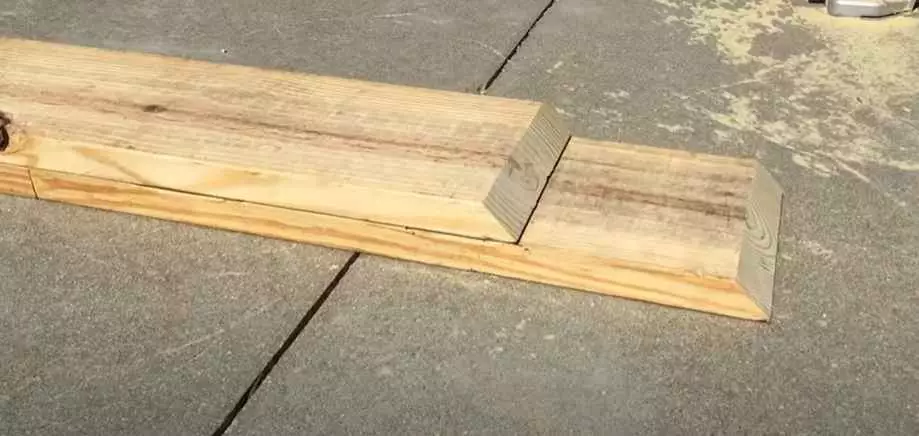
Step 5 – Configure it on your campsite. If you need to use two, you would stack them up as I have right here in the picture below. So, you would have a base layer which would be two boards one to go underneath each wheel. Then, a small extension block will kick out to the back. So, your next layer will build off and if you only needed the one layer obviously then you just eliminate that whole bottom row and you just have the two boards.
You’ll notice that when I cut my boards, I cut them with a 45-degree bevel. Therefore, there’s a little bit of relief when the tire jumps up from ground height to the next level up.
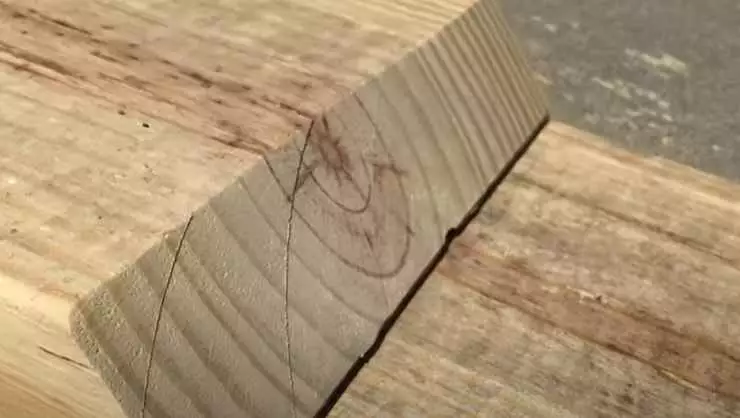
I didn’t have that initially and it works but you always end up with crushed edges. So, this relief cut should help take some of that pressure off. It’ll also help keep your boards from kicking out if you’re riding your brakes as you back up make your move a little easier and you won’t have quite so much movement on your bombs.
Check out in this short video how to place the woodblocks for homemade leveling blocks for campers
Commercial RV Leveling Blocks vs Homemade RV Leveling Blocks
Why Use Commercial RV Leveling Blocks or Homemade RV Leveling Blocks. When parked, the recreational vehicle can be leveled with the help of homemade RV leveling blocks. When parked, the RV should always be leveled within two degrees of inclination or gradient, as measured by a measurement reading of half a bubble outside the lateral thin lines equidistant to the center of the vial filled with the spirit, which is usually ethanol due to its low viscosity and surface tension.
Keep in mind that you can’t just put a piece of wood under the tire and call it a day when it comes to leveling.
To properly support all of the weight, the leveler must accommodate the entire area of contact between the ground and the tire.
It’s also vital not to stack blocks taller than five inches for safety reasons.
The RV leveling is done for a variety of reasons.
- Get enough sleep, because an uneven floor can produce sleeping problems that influence your appeal and social life, even if others don’t notice.
- Reduce the amount of stress on the frame and the framework that supports the recreational vehicle’s weight evenly.
- In order to get adequate tank fluid measurements, leveling is also essential.
- Finally, to avoid failures in RVs with slideouts, the trailer must be balanced.
RV leveling blocks can be prepared at home for as little as $6 and as much as $32 utilizing wooden planks or rubber pavers beneath each tire. Additional measuring with a bubble level instrument is required until a maximum of two degrees of inclination or gradient is obtained.
How To Level An RV
How To Level An RV? What Is The Best Way To Level An RV? There are several methods for leveling your RV:
- Hydraulics are used.
- Blocks for leveling.
- Wooden planks, Wheel Chocks, Rubber Mats
In this article, let’s review together different options for both Commercial Options and Homemade RV Leveling Blocks.
Leveling systems for motorhomes and campers: As previously stated, there are a variety of methods for leveling a motorhome, ranging from basic stones or wood to complex hydraulic legs capable of raising the entire vehicle.
The most typical method, however, is to employ chocks or wedges. We’ll look at the distinctions between the two systems and determine which is the most appropriate.
Difference between Chocks and Wedges
Difference between Chocks and Wedges. Chocks and wedges are a safety feature to have while parking your car because they not only level it, but also secure it on sloping ground.
Although the terms chocks and wedges are sometimes used interchangeably and are extremely similar, they are not the same and can lead to confusion.

To be precise, we’ll say: “What are chocks?”
The chocks perform exactly what their name implies: they chock the wheel. That is, if the handbrake fails, keep it fixed so that it does not skid or turn on highly uneven ground. They serve as the foundation of all life, yet they don’t help to level the RV.
Because the wheel remains in contact with the ground, its use does not qualify as camping.
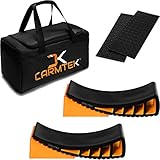
This commercial option for RV leveling blocks by using Curved RV Levelers with Camper Wheel Chocks for Travel Trailers is our recommended commercial option.

What exactly are these wedges? We have wedges, on the other hand, which are used to level the RV or camper when the ground is not totally flat.
As the wheel rides up on top of the wedge, it loses touch with the ground and is classified as camping (according to Spanish regulations). You must be cautious since you may get fined!
The wedges can be placed in front, behind, or on the side, and one or two wedges can be used, depending on your needs.
Wedge wedges for RVs or campers must have certain characteristics.
When purchasing leveling wedges for motorhomes, the following considerations must be made:
• Fabrication material: it must be of good quality and have a grooved surface to prevent the tire from slipping.
• The weight: Because the wedge will have to sustain a lot of weight, you should look at the maximum weight it can support.
• Multiple heights: The wedge must have multiple heights to level different types of terrain. There are three stages of elevation in most cases.
• Wedge width: Another feature to consider is the wedge width, which must be appropriate to the wheel to ensure that the tire does not suffer during use.
Advantages and Disadvantages of Wooden planks or Rubber Pavers
The Benefits of Wooden planks or Rubber Pavers as Homemade RV Leveling Blocks.
Wood planks are nearly always used to make handmade RV leveling blocks and jack pads (as part of DIY RV leveling blocks). While wooden blocks are a cost-effective and rapid option, they are not suited for long-term RV living. As a result, we suggest using rubber pavers instead.
Advantages • Wooden planks and rubber pavers are less expensive because you simply have to pay for the wood, nails, and rubber paver. • Wooden blocks and rubber pavers can be customized. Untreated wood and whitewood perform well and don’t need to be sanded. With a utility knife, you can size them to match your RV’s needs if you’re constructing them at home.
Disadvantages • Homemade RV leveling blocks take longer to set up than store-bought blocks; • Wooden planks and rubber pavers sink in soft soil, requiring you to get dirty digging them out after your camping vacation.
The most cost-effective option to level your RV is to use hardwood planks. It does, however, have some drawbacks. When exposed to the weather, wood planks can swiftly rot or degrade.
They can potentially be dislodged if the RV’s weight isn’t evenly distributed. Having said that, learning how to create your own proper wooden leveler will help you avoid those issues.
Wooden Planks vs Wheel Chocks &Rubber Pavers
Pavers are made of rubber. However, I have not personally witnessed this impact.
For leveling, those blocks are usually 1 inch thick. I put a large stack of 6-10 beneath each leg; the shorter the leg, the less wobble walking inside.
Rubber pavers are a popular choice for outdoor flooring.
The straight edge should be aligned with the cutting line. This will aid in the direction of your cut, ensuring that each cut is straight.
Begin making a series of shallow scores along the cut line with your utility knife. You’ll need to apply some pressure to the knife, but not too much — this is a slow process.
The weight of the paver will draw the cut line open as you cut, allowing you to progress further with each cut.
The weight of the paver will draw the cut line open as you cut, allowing you to progress further with each cut. This reduces the amount of friction on your blade.
Rubber pavers are made from recycled rubber and are available in a variety of colors. Rubber is made up of unused tires and a binding agent like polyurethane.
Rubber Pavers are virtually indestructible; they will not tear and will outlast other flooring materials like carpet. They will never fracture or shatter, unlike other materials, because they are extremely strong and long-lasting.
Planks of Wood
The most cost-effective option to level your RV is to use hardwood blocks. It does, however, have some drawbacks. When exposed to the elements, wood planks can swiftly rot or degrade. Untreated wood is fine in any case, and whitewood, which is a generic non-graded wood, is fine and less expensive.
If desired, you can always use a sander to finish the job. It’s also acceptable to leave the timber alone. Simply make sure the wood is sturdy and not old or decayed.
They can potentially be dislodged if the RV’s weight isn’t evenly distributed. Having said that, learning how to create your own proper wooden leveler will help you avoid those issues.
So, what is the maximum size of wooden blocks that can be used?
Wooden Blocks That Can Be Adjusted – DIY RV Leveling Blocks
Let’s review these Wooden Blocks That Can Be Adjusted – DIY RV Leveling Blocks.
Get a length of 2-by-8-inch treated lumber and a few feet of 34-inch PVC tubing to build leveling blocks that may be used in a variety of circumstances. For each number of blocks, you want to build, cut the lumber into three pieces: 14 inches, 20 inches, and 26 inches.
On all pieces of wood, raise the edges. A pyramid will be formed by the three various sizes. This is to make it easier to drive up without creating a steep slope that causes the block to slip out of place when driving on it.
Make a three-tiered stack by stacking three distinct sizes on top of each other.
Drill two 1-inch holes through each of the three leveling blocks, but not through the bottom one. This is because you don’t want the tubing that holds the stack together to fall through the bottom block when it’s being stacked.
Cut two sets of 34-inch PVC tubing now. The first pair will be longer to keep three blocks together, while the second set will be shorter to hold two blocks together. Make sure to cut the tubing just a little shorter than needed so that it doesn’t stick out the top when placed in the holes.
For each set of leveling blocks, you want to make, repeat the procedure. You should have a set for each tire you need to support in the end.
You now have a collection of leveling blocks that can be used singly or in combination.
Wooden Blocks are the most cost-effective option to level your RV.
Hydraulic Leveling
Hydraulic leveling systems are a simple way to achieve precise RV leveling. As needed, the system will raise or lower a section of the RV.
It can move individual corners independently, but it is preferable to lift an entire end or side at once. Excessive movement of single corners can cause your RV’s frame to twist.
It is also critical to consider the surface on which your RV is parked. Preferably, this should be a hard surface, such as concrete. If the RV is parked on a soft surface, such as dirt or even soft asphalt, the jacks may sink into the ground.
Hydraulic, auto-leveling, and purchased leveling blocks are alternatives to homemade RV leveling blocks.
There are two primary alternatives to the homemade RV leveling blocks discussed here: Hydraulic systems, as well as auto-leveling systems, are common in class A RVs.
Of course, purchasing your own blocks is a popular alternative to making your own RV leveling blocks.
In most cases, we will see a combination of two systems: An hydraulic system is used for auto-leveling.
Hydraulic leveling systems are a simple way to achieve precise RV leveling. As needed, the system will raise or lower a section of the RV.
Hydraulic systems are frequently used in conjunction with auto-leveling, which is an alternative to homemade RV leveling blocks.
Blocks for Leveling
Leveling blocks are a low-cost but effective way to stabilize your RV.
If you enjoyed playing with building blocks as a kid, you’ll enjoy these. The majority of leveling blocks can be joined together to form an incline. This will make it much easier for your RV to keep them in place as it drives onto them.


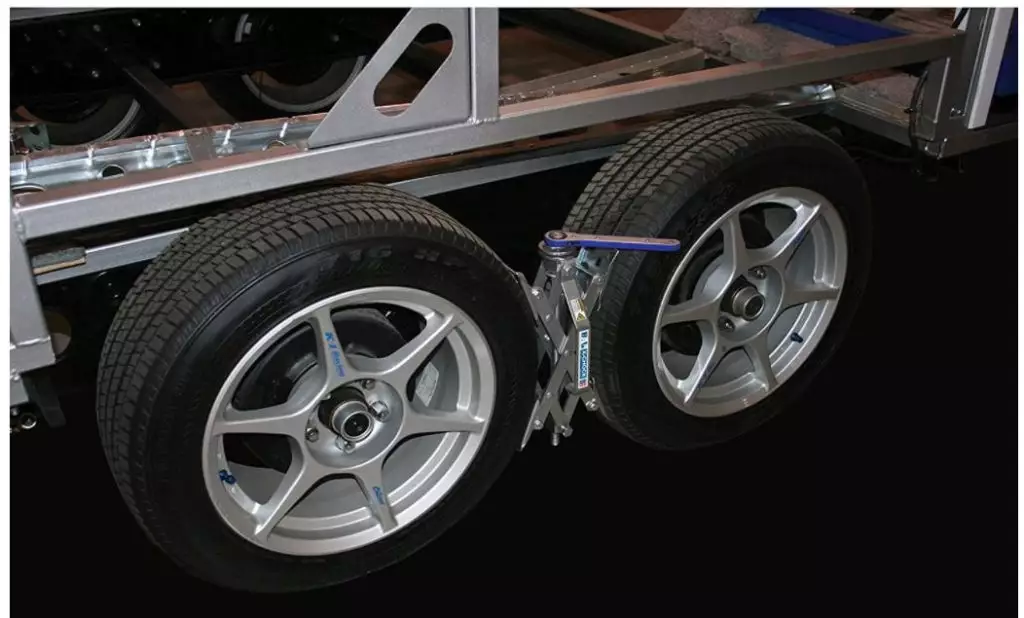
Another option to provide stabilization is the one below with a wheel stabilizer.
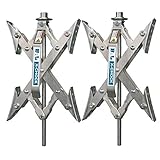
- Provides added stabilization and prevents tire shifts by applying opposing force to tandem tire applications
- As opposed to other chocks, the X-Chock works with the tires’ natural movement instead of against them
- Fits even the tightest of applications retracting down to 1 3/8” and extends to 10”
It can move individual corners independently, but it is preferable to lift an entire end or side at once. Excessive movement of single corners can cause your RV’s frame to twist.
It is also critical to consider the surface on which your RV is parked. Preferably, this should be a hard surface, such as concrete. If the RV is parked on a soft surface, such as dirt or even soft asphalt, the jacks may sink into the ground.
Purchasing RV Leveling Blocks Rather Than Making Your Own
Purchasing RV Leveling Blocks Rather Than Making Your Own. These use an interlocking system that allows them to support massive weights, up to 40,000 pounds in fact. They will cost you slightly less than $30.
Instead of making your own RV leveling blocks and DIY RV leveling blocks, you may buy them.
We propose using homemade RV leveling blocks because they are significantly less expensive and simple to make.
To create an incline, most leveling blocks can be connected together. As your RV drives onto them, this will make it much easier to maintain them in place.
These use an interlocking system to hold a massive amount of weight, up to 40,000 pounds to be exact. All of these solutions can cost around $60.
It strikes me as intriguing that we can save roughly $50 by purchasing hardwood blocks from your local home center or cutting rubber pavers with a utility knife.
If you just want to buy these RV leveling blocks and save some time, that’s fine. The following Homemade RV Leveling Blocks and not homemade RV Leveling Blocks are some of the most popular styles on the market:
Leveling blocks for RVs: There’s a good chance you’ve seen these blocks under RV tires in most campgrounds. Leveling blocks are simple to use, lightweight, stackable, and inexpensive (as low as a few dollars for a 4-pack). Although it may take a few tries to obtain your desired height, they’re a wonderful alternative for a variety of RVs – just make sure to check the maximum weight capacity of your product. Keep in mind that they can grow delicate and break over time, but replacing them is straightforward.
Although less frequent than blocks or ramps, an RV leveling tire lock is still an excellent solution — but only for light trailers. It’s simple to set up and avoids the guesswork that comes with using RV leveling blocks. Keep in mind that this alternative is more expensive than both blocks and ramps, and it has a proclivity for sinking into the dirt beneath your RV tire.
Leveling ramps for RVs: An RV leveling ramp is unbeatable in terms of convenience.
If you don’t get the level perfect the first time with leveling blocks, you’ll have to go through a series of processes. Simply place the wedge in front of or behind your wheel(s) with leveling ramps, get in, and move until your buddy says you’re level. On e-commerce online stores, you may get a broad variety of RV leveling ramps at reasonable costs.
Automatic RV Leveling – Auto-Leveling for RVs
We shall discover that class A RVs use a hydraulic system to achieve the leveling.
Some of the most luxurious class A RVs will have a “Level” button. The motorhome will automatically level itself when you press this button. Some people will be able to lift the RV off its wheels.
Most Class A’s and certain towable RVs have an Auto-Leveling System or hydraulic leveling system, which makes leveling as simple as pressing a button.
These normally make any necessary changes by raising the low corners of your RV using hydraulic jacks.
These techniques are fantastic, but you must begin on a level surface, so get your bubble level out and make sure you’re as level as possible before you begin.
When you get there, park your RV on the downhill side of an uneven campsite or parking space. You want your low corners to be in the front so you can level the RV by raising the front end rather than the back.
Because only your rear wheels are locked when you’re in Park, this is a requirement. If one or both of the back wheels are lifted off the ground, your RV may slide off the jacks! Check your front wheels if you have any worries, and activate the parking brake if necessary.
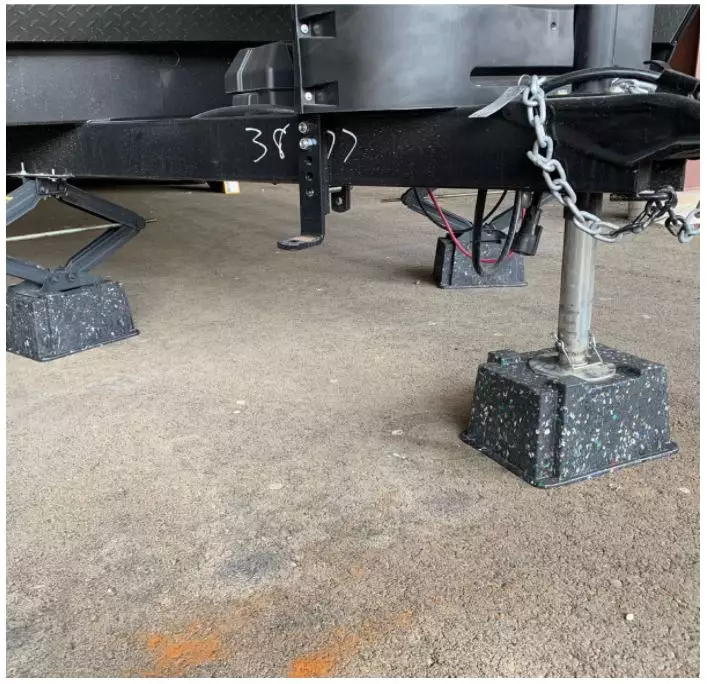
Place blocks or jack pads under your jacks once you’ve parked properly. Make sure your jacks aren’t going to be placed on an icy or slick surface, otherwise the footpads may slip.
Jack pads keep your jacks from sinking into the ground and safeguard the parking pad at your campsite. If it’s hot outside, keep in mind that jacks can sink into the asphalt.
Using your control panel, use your Auto-Leveling System to level your RV. Lights on your control panel will indicate which corners are low. To automatically level those, use the relevant buttons.
Because each leveling system is different, examine the instructions you receive at the dealership for particular information on the leveling system installed in your RV.
How To Level A Motorhome With Leveling Wedges
Manual Installation Of The RV Leveling Blocks
The RV Leveling Blocks Must Be Installed Manually
After we’ve put our homemade RV leveling blocks in place, we should adjust them. This will require a manual adjustment.
Let’s have a look at how to adjust the DIY RV leveling blocks by hand. Let’s do your Homemade RV Leveling Blocks.
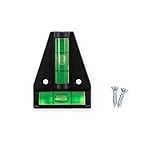
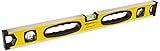
Take out your bubble level and check it from left to right and front to back. A nice place to put the level is on a countertop. You may be able to level your RV simply by raising one low corner onto blocks, so double-check your level from left to right and front to back before getting started.
If your level is off the only front to back, drive up on blocks and raise your front or back wheels. Which ones you elevate onto blocks is determined by the level of your bubble.
If your level is only off left to right, drive up on blocks and raise both of your right wheels or both of your left wheels. Which ones you elevate onto blocks is determined by the level of your bubble.
Raise the one low corner on blocks if your level is off a little from left to right and front to back.
Always keep in mind that you want to start as level as possible.
You should pick another campground if the level is wrong and you would have to drive upon a stack of more than three leveling blocks. However, I believe that RV parks are already rather plain, so this will not be a problem.
Many Class B and Class C RVs will lack an automatic leveling mechanism, which is a feature found only in Class A RVs. As a result, once we’ve finished laying out the RV leveling blocks, you’ll have to manually level your motorized RV.
You’ll need to level your RV from front to rear and left to right. The methods to getting your rig leveled are outlined here.
Let’s look at how wedges are employed now that we know they’re used to level rather than wedges. The process of leveling the motorhome using wedges is straightforward, but we’ll go over it because there’s always a first time for everything, and there are a few pointers to keep in mind.
In essence, the wedge is put longitudinally in front or behind the wheel, and you gradually accelerate until the wheel reaches the required height.
Adjust the heights of the motorhome.
The wedges have three heights, as shown in the photo.
Because the ground may not be level, one wheel may have to be higher than the other.
In this situation, first, place a wedge on one wheel and elevate it to the first wedge height, then place the second wedge on the other wheel and raise it another height.
One wheel will be lifted to the second height of the wedge, while the other wheel will be raised to the first height of the wedge.
How many wedges should you put in: one or two?
The wedges are always sold in pairs and can be used on the front, back, or side wheels, depending on the terrain’s slope and unevenness.
But, may only one wedge be used, or must both be used?
It’s fine if you only need to put a wedge to get the RV or camper level; it’s not necessary to put both.
Using wedges as wedges is a technique that has been used for a long time.
When it comes to leveling the RV or camper with wedges, they can also be used as chocks, securing the wheel in the event of a lot of unevenness.
When placing the wedge in this situation, keep in mind that the wedge’s slope does not align with the land’s slope, but rather the other way around.
Additional security is provided by wedges that are fastened to the wedges.
RV Leveling (Left to Right)
Use Your Bubble Level
1. As you approach your campground, strive to get as near to being level left to right as possible. When you’re pulling, rolling forward or backward can help you get near to level left to right.
2. Check your level left to right with a handheld bubble level (or a built-in level inside your RV). The RV floor, the RV’s back bumper, or a tabletop are all acceptable places to put your handheld bubble level.
Raise Your Blocks
3. Get your set of blocks if you’re not level. To level the RV from left to right, you’ll raise your left or right tires by pulling the RV onto blocks.
4. Determine whether you need to raise the right or left tires to level the vehicle from left to right.
5. Take note of the angle at which your campground and trailer are situated. Determine if it is easier to roll the RV back onto blocks or to pull it forward onto blocks. Place your blocks behind the wheel if you’re planning to roll back. Place the blocks in front of the wheel to help you go forward. If you’re near to reaching level, try going up one block at a time. If you’re a little off, try going up two blocks.
6. Check to see if you’ve leveled out. You may need to add another block if you aren’t yet level. Build a platform to make it easier to drive up (or rollback) on the blocks––for example, use five blocks to produce a ramp or slope to go up the height of two blocks.
Chock Up Your Tires
7. Do not unhitch now that you are level from left to right. Instead, grab your wheel chocks and chock the wheel you didn’t raise blocks with them. To keep your camper from rolling, place a wheel chock on both sides of the tire.
Wheel chocks and wooden boards together. When the surface is not concrete, cement, or asphalt, wooden boards are required.
8. Now that both tire chocks are securely in place, you can unhitch.
Level Your RV Front to Back
Your RV should be level from front to back. First, use your bubbles level.
1. Take out your bubble level once more, but this time measure the level of your RV from front to rear.
2. Adjust the Jack Adjust your level by lowering your Fifth-Landing Wheel’s Jack or your travel trailer’s A-Frame Jack onto blocks to bring your RV level front to rear. Power jacks and hand-crank jacks are both available.
Stabilize
3. Lower (or put) your stabilizers now that your RV is level. Make sure they’re all under the same amount of pressure.
4. If you have slides, you can extend them now that your RV is level and stable.
Side-to-Side Wood Leveler (DIY) – Homemade RV Leveling Blocks
In the following paragraphs, let’s review what is needed for our Homemade RV Leveling Blocks.
Let’s start with the section “Side-to-Side Wood Leveler (DIY) – Homemade RV Leveling Blocks“. Now that we’ve learned about the many methods for leveling your RV, we need something inexpensive and quick. As previously said, wood is the most cost-effective option.
What You Will Require:
- Two 8-foot lengths of 210 wood planks
- A tape measure.
- A saw is required. (if you can find one that reciprocates)
- A sander with a belt.
- A screwdriver and screws
- The glue can withstand a lot of abuse.
How to Go About It:
- First and foremost, you must obtain the correct measurements; this is critical.
- The axles must be measured from center to center.
- Then, determine the distance between the tires on the ground.
- To match the measurement of the distance between the tires, cut a piece from one of the boards.
- Bevel both ends of this piece with the belt sander.
- Cut a comparable piece of the same size, but just bevel one end.
- To make it easier to drive the RV onto the longboard, one end should be beveled.
- Find the middle of the two short pieces and mark it (on the side edge).
- Align both straight edges of the short piece with one bevel on the longboard. Make a similar mark on the longboard to the center mark on the tiny wood.
- From that point on the longboard, measure the center-to-center distance (A), then make another mark.
- Align the second short piece on the longboard to the second mark.
- On the longboard, there are two little pieces.
- The bevel sides of the two little pieces on the longboard should face each other. Make sure the long board’s markers correspond to the mini boards’ center marks.
- With this leveler, you’ll be able to level your RV by one and a half inches.
- If you need extra height, simply drive the RV up onto the little boards, which will give you a three-inch boost.
Look for untreated wood if you want to save a few dollars.
Leveling the Playing Field
That concludes my Homemade RV leveling blocks vs Commercial RV Leveling blocks. It’s not difficult to create, and it’s certainly not costly.
Looking for RV Boondocking Experiences – Rent an RV in Alaska – Complete Guide to Visit
Learn more about Top 15 Old and New Retro Campers
Recommended articles for you How to Unclog an RV Toilet and How to Winterize a Camper, to Travel and Live In