
If you’ve ever walked into your RV and found water on the floor or been on the road and found you had “leaks” in the middle of a rainstorm, this article is for you to solve problems related to the RV roof vent leaking. In the past, we have discussed how to seal the RV roof and how to inspect it. RV Roof vent covers are a feature needed to prevent any water leaks from coming inside the RV. In this article, I am going to give you particular information about fixing the RV refrigerator roof vent cover leaks, the RV roof vent cover seal, and how to change the RV roof vent cover. We provide a good review of RV roof vent covers.

Table of Contents
First, Inspect the RV Roof and the RV Fridge Roof Vent Cover
Have you ever walked into your RV and found water on the floor? Have you ever been on the road and found you had “leaks” in the middle of a rainstorm? Let’s review together how to solve problems related to the RV roof vent leaking.
Firstly, inspect the RV roof and the RV fridge roof vent cover. When there is any type of water leak and water is found inside the RV, particularly if there is rain or snow, it is advisable to check the entire RV roof.
Many times, there is more than one source of this water leak. Although we are going to discuss fixing the RV refrigerator roof vent cover leaks, I recommend that you do a complete inspection of the RV roof and never assume a single source of the water leak. Otherwise, you will be stuck with the same problem that you will not be able to solve correctly.
A good problem solve seeks to cover all possible scenarios to get to the root cause and eliminate it effectively.
When it comes to your RV’s roof, this means you should take a proactive approach to keep it protected against water infiltration rather than taking a passive approach and waiting until you notice evidence of leaks on the inside. There is more work to be done than merely fixing the leak by the time you notice water inside your RV.
First and foremost, safety: Getting up on your RV roof might be dangerous, so take precautions ahead of time to ensure your safety. If you don’t feel comfortable wandering around on your RV’s roof, an RV service center can be a better option.
If you have a lot of leaves or pine needles on your roof, start by brushing them off or blowing them away with a leaf blower. To remove dirt and grime, clean the roof with a soft to medium bristle long-handled brush in a gentle scrubbing motion.
Consider using a tiny hand brush or even a stiff-bristled toothbrush for harder stains or regions with limited access. If your RV has a crank-up TV antenna, elevate it before washing to gain access to the areas that would typically be on the roof.
Remove any loose sealant, carefully clean the area to be sealed (following the instructions on the new tube of sealer), then seal with the proper sealant available online or from your local RV dealer once you’ve identified probable water entry points.
While you’re up there, look for cracks and UV damage in all of the vent covers (roof vents, refrigerator vents, skylights, and plumbing vents) and replace them as required.
Finally, verify that the bolts on the roof air conditioner(s) are correctly tightened, allowing the gasket to retain the seal, to ensure the integrity of the entire roof.
Remember that, unlike a traditional house, your RV bounces and twists down the highway while being exposed to fluctuating levels of UV radiation and contaminants, necessitating more frequent maintenance.
By evaluating your RV roof regularly and doing the necessary maintenance, you can stay on the offensive and avoid an unpleasant surprise, as a roof leak is an adventure in RVing that none of us want to go through.
Rv Refrigerator Roof Vent Cover Leaks – Troubleshooting
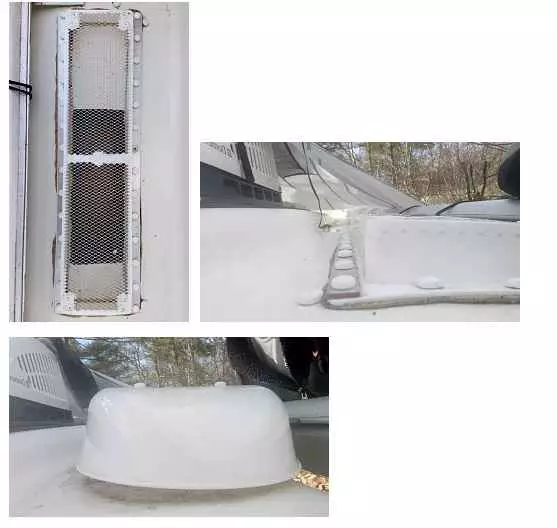
One of the situations for which we are commonly consulted by our readers, and that I personally have also experienced in my RV a few years ago, is when the RV roof vent cover seemed to fall off completely..How I can replace this RV roof vent? Where can I find the best price on a replacement for RV Refrigerator Roof Vent Cover Leaks? Does anyone have trouble with rain entering the side vent for the fridge? Sure, you have it. If so how does one fix it?
One water leak problem that an RV can have is to see water seeping from under the cooler and spreading to the rest of the RV floor in the kitchen area of the living area.
When one sees this it is very likely that the water leak in the RV is coming from the roof vent of the RV cooler only leaks when it is raining. So, the first thing we usually do to quickly mitigate the problem is to cover the vent on the roof with a plastic, tarp, or something to block the water from coming in, and once that is covered we see if the amount of water coming in and leaking has stopped.
It may not be easy to tell at first if the water is coming in through the side vent or some other leak in the roof. That is why it is always recommended to inspect the entire roof of the RV and not just take the first leak detected.
RV Refrigerator Roof Vent Cover Leaks: What Is The Problem And How To Fix It?
Rainwater seems to enter or splash through the vent openings, collecting on the board that supports the refrigerator controls. It then goes under the refrigerator and into the Scamp’s floor.
The refrigerator ventilation for the Dometic CR1110 works very well although it is advisable to eliminate annoying drafts, especially in winter.
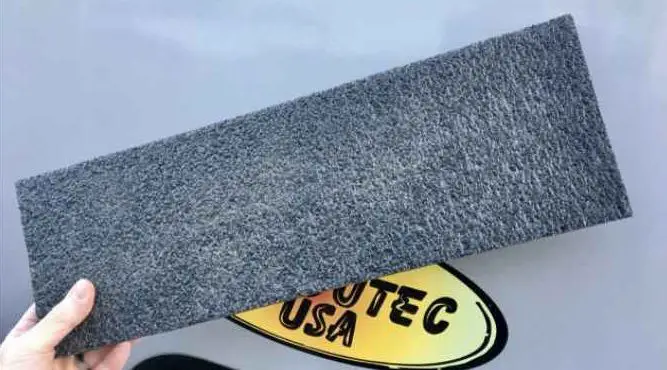
This is a recurring problem that we can encounter with different travel trailer manufacturers. In winter we are looking to keep the heat inside the camper and energy. This represents one of the fundamental objectives when winterizing the camper. Therefore the cold and annoying drafts inside our travel trailer coming from the RV refrigerator roof vent must be eliminated or mitigated. The simplest solution to still maintain some ventilation and not affect the efficiency of the refrigerator but eliminate annoying air leaks is to use a piece of rigid foam in the vent. We simply cut and insert a piece of rigid foam into the RV cooler vent before winter and remove it before summer. Sometimes it is necessary to do a little research on the internet to find the right type of foam, because it must be something flexible, of a suitable thickness, there is no fixed size that I can recommend. It should not be excessively thin, otherwise, it will not have the body to stay upright in position, it should not wrinkle or fall apart in pieces over time. It is also recommended that it be flexible enough so that fingers can be inserted into the vent frame to remove it when necessary. This will provide insulation during the winter.
If you are going to store your RV in storage, I also advise you to put in one of these inserts. Even if it is indoors, it is very beneficial because it keeps out dust, mosquitoes, spiders, etc., and helps control the temperature inside the RV.
There has been a time when our Scamp has had water on the ground after traveling in heavy rain. This has happened several times during our 3 years of ownership. And we never had this problem when the Scamp was in storage, indoors nothing like this happened and we could not determine where these water leaks were coming from.
We have consulted with several different manufacturers about what our users tell us and even many travel trailers have been inspected in factories thanks to our recurring consultations with them. The manufacturers have been able to confirm our suspicions about the cooler roof vent being the source of water ingress.
An easy way to find the source of the water leak is to do the following experiment. On a dry day, without rain and with a dry roof, with no water accumulated, open your garden hose to “shower” the caravan from above with a hose. Any existing leaks will be revealed and you can easily find the cause.
Now, and here is the interesting thing to detect when the leaks originate in the RV roof vent. When you “shower” with your hose from above, you probably won’t be able to get water inside the travel trailer through the RV roof vents. But if you seek to flood the roof with a strong jet from the front of the RV with a hose, you will see the water glue inside through the vent, splash the top of the refrigerator, and flood the floor.
This same situation occurs in numerous RV roof vent models and this is why different models of RV Roof vent covers are required to fit each model to allow adequate ventilation but prevent any water ingress.
Completely covering the ventilation from the outside with a plastic tarp is never a solution. It is only something to temporarily mitigate the problem until we have the right elements to work on the RV Roof vent cover plan.
One of the options is to try to reduce the vent opening with some weather stripping glued on. On many travel trailer models, this is sufficient. To check if weatherstripping has solved the problem, again try washing or “showering” the trailer with the hose. If water still gets in when washing the caravan, the problem remains and a better solution is needed.
A different RV Roof vent cover can keep your camper refrigerator vent safe and secure. Rain, wind, snow, and even dust are kept out of your vents with these specially made camper covers. With our selection of camper refrigerator vent covers, you can protect your vents and avoid having to replace them as frequently.
These vents provide safety and a touch of elegance to your camper while also making life easier for you with simple installation and future maintenance. Our roof vents come in a range of designs, colors, and types to ensure that you have all you need for your next camping trip.
Water does not splash up through the vents; rather, it enters through the junction between the detachable plastic vent panels and the housing into which they are installed. It appears that the gasket material that makes this a watertight union was not installed.
Examine the beige package containing the refrigerator handbook. You could discover a roll of 1/4″ foam weather stripping if you’re lucky. Installing it takes roughly 3 or 4 minutes.
If the weather stripping has to be replaced, it is included. The coach’s manufacturer, not Dometic, provided the weather stripping. The foam weather stripping comes with no instructions from Dometic.
If the leak occurs around the vent’s frame, it was not adequately sealed. With gusts of wind pushing the rain sideways, this is conceivable if water is pouring in via the vent. We appreciate the chance to speak with you about your issue, and we wish you safe travels in the future.
I’ve spoken to one or two other folks who have experienced the strange problem of water coming in via the fridge vent. It appears to run along the edge and then into the corner on occasion. It’s humorous and unusual since it only happens once in a while and is never consistent, at least on the few occasions I’ve seen it.
We replaced the previous vents since they were infamous for leaking in certain windy or driving situations, and they have functioned extremely well for the most part.
You could probably attempt some sort of seal around the corners of the vent where water can flow along the edge and leak through. If it doesn’t work, we’ll have to replace the vent. We’re not entirely sure what’s causing this problem. When looking at the vents, it appears like they are practically hard to leak through.
I just finished installing small gutters made of 1/4″ channel aluminum immediately over the refrigerator vents.
I used epoxy putty at the bottom of each assembly and then sealed it with marine-grade silicone. We experienced a strong rainstorm shortly after the installation to try out the new system. This method eliminated the leakage from the vent edges and top portion. A minor amount of water is still pouring in above the vent. I believe it is coming in from the porch light.
RV Roof Vent Cover Seal
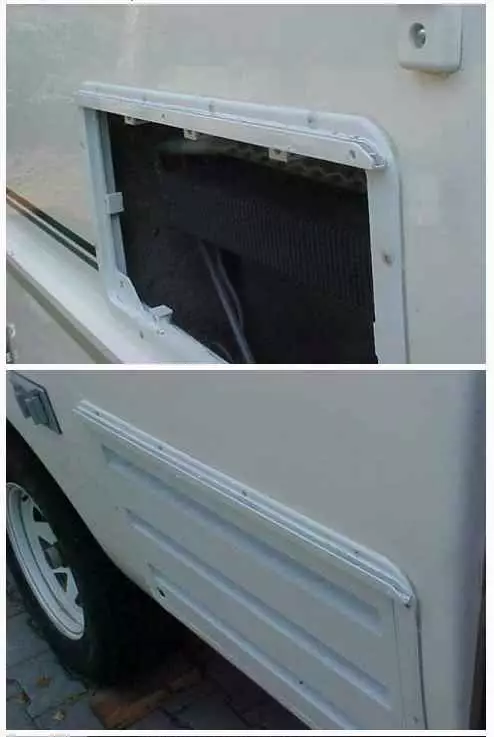
Water does not always enter between the vents of the RV refrigerator roof vent. Note that water leaks can also occur because the RV refrigerator roof vent cover is not properly sealed.
Several years ago, I discovered that the side vent was not installed properly. The bottom edge of the frame was bowing inward into the compartment and allowing water to leak into the trailer. I had to shim the bottom of the vent frame so that it sloped outward.
Another possibility I would consider when observing water leaks that appear to be coming from RV roof vent areas is the deterioration of the vent grille, especially the base which is largely hidden. If the vent or frame has any cracks it will allow water to enter.
If you are repairing the roof of your RV, this article about RV Roof Sealant – Best RV Roof Sealant vs RV Roof Coating may be of interest to you.

- ➊ The Camp'N Replacement RV Roof Vent Cover is compatable with most popular roof vents. Compatable with Ventline roof vents prior to 2008 and Elixir roof vents starting 1994. Please reference the images in the listing to make sure your vent is compatable with this replacement.
- ➋ Each Camp'N RV vent cover replacement measures 14" x 14"
- ➌ Our Highly Durable rv ceiling vent covers are manufactured with impact resistant plastics for longlife.
The grille and frame of the RV roof vent covers should be inspected routinely. To do this you will need to remove the screws and then the top. Follow up with an inspection of the vent base and seal on the roof. It is quite possible that the flat base has separated from the curved roof. The screws may be in bad shape as water sits in the holes.
In my experience, I would say that most vents would leak under some conditions. A garden hose or a pressure washer are not natural conditions and could easily force water into the camper. The vent is designed more to stop rain from above.
Finally, even if all roof leaks are stopped, likely, water will sometimes enter through the side (intake) vent. If the wind and rain (or hose stream) hit it the right way, I doubt there is any way to stop a leak. If it’s just once in a great time, then mop it up and get it dry and it should be fine.
Remember that seeking to restrict water ingress by covering the vent is not a definitive solution as restricting airflow could reduce the efficiency of the cooler, as well as cause heat condensation inside the camper.
Remember that the vent system is made up of two parts: a base assembly that attaches to your RV’s roof and a lid assembly that attaches to the base assembly. You didn’t say which part is “ready to fall off,” so you could simply need the lid assembly (about $20) or the base assembly with a new lid (around $30).
If the base assembly is “ready to fall off,” delve a little deeper to ensure that the roof structure (EPDM/TPO roof membrane and underlying OSB paneling) are both in excellent working order.
If the base assembly has fallen loose due to water damage or wood decay, you must first repair the damage before replacing the vent.
And, depending on the refrigerator manufacturer, the lid comes in a variety of sizes. It’s best to take two measurements and place one order.
They have a “brand particular” feel about them. A Norcold roof vent top will not fit the Dometic base assembly if you have a Dometic refrigerator. So, either bring the “part you need” with you so you can obtain the right one or get all the information from it so you can tell the parts guy what you require.
If you walk into a store and say, “I need a refrigerator roof vent top cover,” you’ll be asked, “Which one?” or “Dometic or Norcold?” or “22” or “20”?” or “OEM or aftermarket?”
When you go to the RV store, bring the old one with you. It’s not worth it to browse around because they’re so inexpensive.
If I were shopping for a new one, I’d probably pay a little more for one with a solar panel on top that powers a cooling fan. On a hot day, a little more air circulation is beneficial.
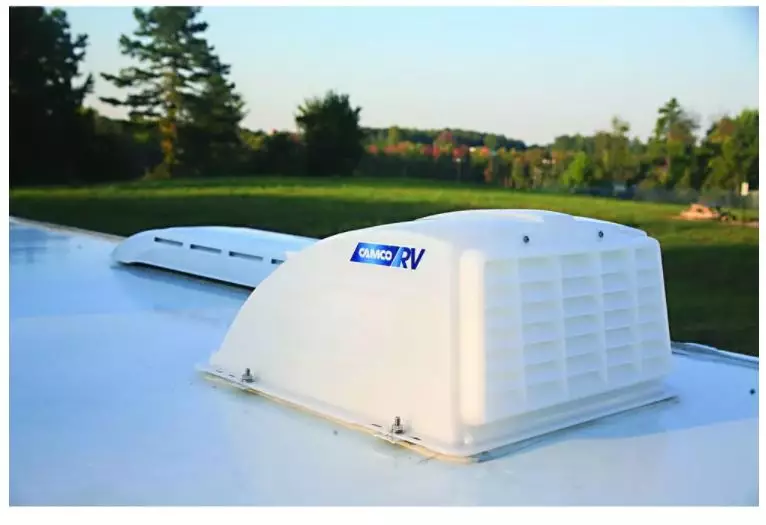
Best RV Roof Vent Covers
Many people use to ask us what is the best RV roof vent cover. Some of the best RV Roof Vent Covers that we have tried are CAMCO, CAMCO 40435 RV roof vent cover, CAMCO 40431 RV roof vent cover white standard, as well as other models very useful and affordable.


One of the advantages of the CAMCO RV roof vent covers besides being cheap and really useful is that they are very easy to install. See the video on How To Install A Camco RV Roof Vent Cover
If you find another RV roof vent cover in the market that you think could bit Camco, please let us know and we will try it.
We hope you have found this article about fixing the RV refrigerator roof vent cover leaks, the RV roof vent cover seal, and how to change the RV roof vent cover very useful and a great help to eliminate any type of water leaks and unwanted drafts during the winter by improving your RV fridge roof vent cover.
Looking for RV Boondocking Experiences – Rent an RV in Alaska – Complete Guide to Visit
Learn more about Top 15 Old and New Retro Campers
Recommended articles for you How to Unclog an RV Toilet and How to Winterize a Camper, to Travel and Live In